Smooth Moves In Adobe Illustrator
By Kristian Gabriel, Adobe Expert/ACI
How many times have you looked at the curves of a logo or professional typography and wondered how they achieved those impossibly smooth curves. If you're a natural born artist and you can sketch or paint, you're already ahead of the game. But, what if you're not, and drawing simple curves seems like a hassle? The following are some simple and powerful ways to keep your lines smooth and beautiful!

Need to learn Adobe Illustrator? Why not join one of our hands-on Adobe Illutrator classes? Classes taught by professionals offered monthly in Los Angeles, and our trainers can deliver onsite training right across the country. Obtain a quote for onsite Illustrator training.
Freehand with Brushes and Pencils

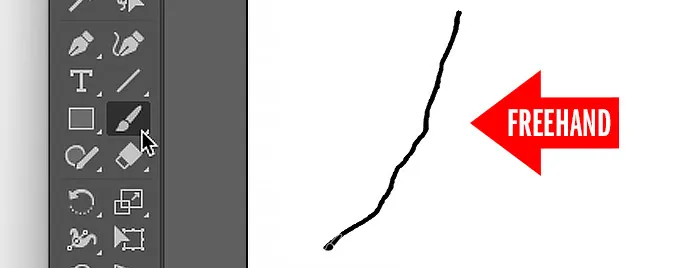
Typically, when drawing freehand with a mouse, you might get what you see above. An imperfect curved line. Unless you are drawing cracks or grungy stick figures this is typically what you get. It is based on how steady your hand is with a mouse. Most digital artists would use something like a Wacom tablet or a touch screen device with a pen to organically draw a smooth, curved line but if you don't have these things, a mouse is a poor substitute. Luckily, Adobe has thought of this and has built in some amazing features to help you smooth your lines. One such feature is the ability to adjust the Fidelity of a tool. Fidelity adjusts your tool's accuracy or exactness. Let us select the Paintbrush Tool. Now, to adjust the Paintbrush Tool's fidelity, Double-Click your Paintbrush Tool icon in the Tool Panel, so you can bring up your Paintbrush Tool Options.

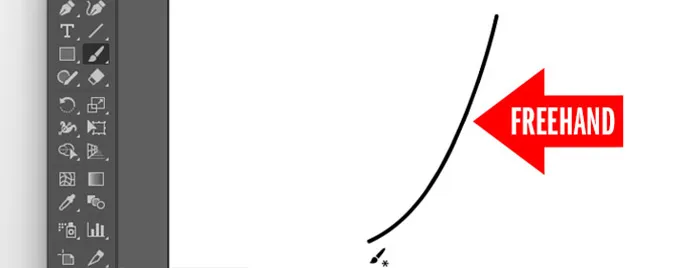
Much, much better! Now if you continue to draw maximum smoothness will be applied. Remember that if the smoothing is too much, you can always dial back the "intensity" using the Fidelity slider.

Once you've drawn or traced your object and have created paths, you can add some interesting brush styles by going to your BRUSHES PANEL and clicking on the brush stroke desired. For more brushes, click on the Brushes Panel menu in the upper right hand corner and go down to the Brushes Library.

Additional stylization of your logos and/or lettering can be fine-tuned with tools such as the WIDTH TOOL. The Width Tool allows you to change the thickness of the stroke at different parts of the path segment. Variable stroke widths can greatly enhance a stroke when it is too uniform. Other tools that can help you manipulate your path artistically are the Warp, Twirl, Pucker, Bloat, Scallop, Crystallize and Wrinkle Tools.
Alternate Methods to Smoothing Pathways

To be clear, any path can be smoothed. In most cases, there is more than one way to do it. For example, let’s use the PENCIL TOOL. You can usually find this tool by right-clicking on the SHAPER TOOL in your Tool Panel and then selecting the tool right below it (this can also be activated by pressing ‘N’ on your keyboard).

Drawing with the Pencil Tool is always an adventure and unless you have a super steady hand - you might end up hating this tool. Draw a curved line. Now, we can fix this line by adjusting the Pencil Tool's Fidelity, just like we change it on our Paintbrush, but we are going to use a different method. This method is called the SMOOTH TOOL. Whether you are using a Brush, Pencil Tool or the Pen Tool the Smooth Tool allows you to smooth a pre-existing path.
First off, make sure your path is selected. Then, select the Smooth Tool in the same category as your Pencil Tool. It's right below it! Just right-click on the Shaper Tool or your Pencil Tool and you will see a "striped" pencil. Select this.
Then, to alter the intensity of the smoothing - double-click on the Smooth Tool Icon in the Tool Panel (as illustrated above) and slide it to the left or right. Now you can use the Smooth Tool to draw across the rough parts of your line and smooth it out by hand!
Beyond these methods, you can always just get better at drawing with the Pen Tool, which is a more challenging, but a more precise or "mechanical" way of creating smooth lines. No smoothing needed!
