Assigning resources to tasks - Auto Schedule Mode
In this article we will show you step-by-step how to add resources to tasks in MS Project's Auto Schedule Mode.
Need to learn MS Project? Why not join one of our small Microsoft Project classes in Los Angeles call us on 888.815.0604.
Steps
- In the Gantt Chart view, select the Task
- On the Resource tab of the ribbon click the Assign Resources command
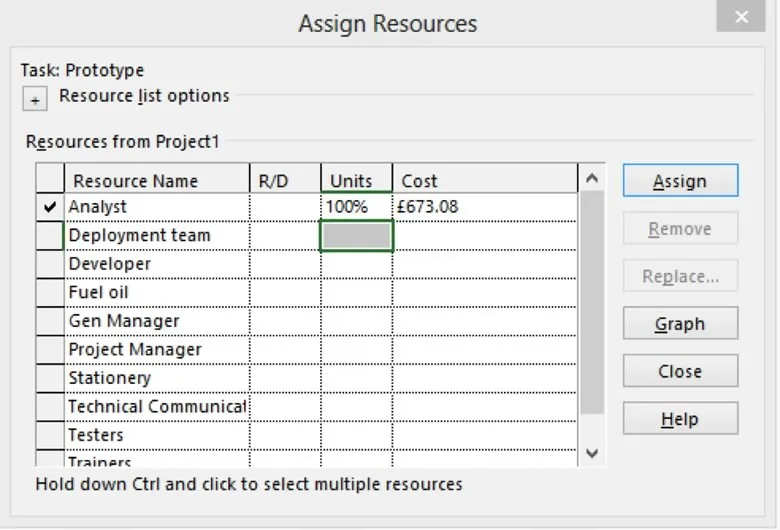
- In the Assign Resources dialog box, from the Resource list select the Resource and click the Assign button:

Note: the Resource’s Units on this Task are by default set to the Resource’s Maximum Units for this project set in the Resource Sheet, but you can edit the Resource’s Units on this Task to a lower % if required. The costs for a work type resource are displayed but cannot be amended here.
Tips:
- you can leave the dialog box open for assigning to other Tasks
- to assign the same Resource(s) to more than one Task at a time, select the Tasks before using the Resource Assignment dialog box
- to assign more than one Resource to Tasks, select the Task(s) and select the Resources in the dialog box before clicking the Assign button
- use SHIFT or CTRL to select contiguous or non-contiguous Tasks
- the Task Duration does not change on the first assignment of Resources to a Task, even if you assign more than one Resource - the Work hours for each Resource are by default equivalent to the full Duration. However, if you later assign additional Resources to the Task, the workload is shared - see below on how to have complete control over the split of the work between multiple resources on a task
- by default the resource name is displayed on the Gantt chart - you can choose to display the initials (or any other data) against each Task bar - (this is covered later in the course).
GanttProject: Adding a Resource
Assistance in finding resources with available working time
In the Assign Resources dialog box:
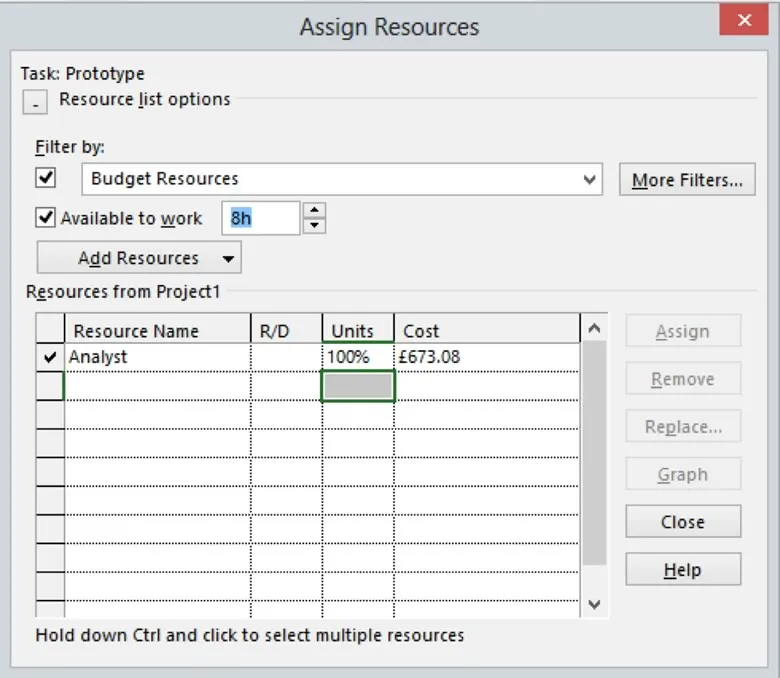
- Click the Resource list options to expand the dialog box
- Tick the Filter by check box and make sue All Resources is displayed (alternatively you can filter for a specific resource group, etc)
- Tick the ‘Available to work’ check box and enter the number of hours availability for which you are searching
- The list of resources will be automatically filtered:

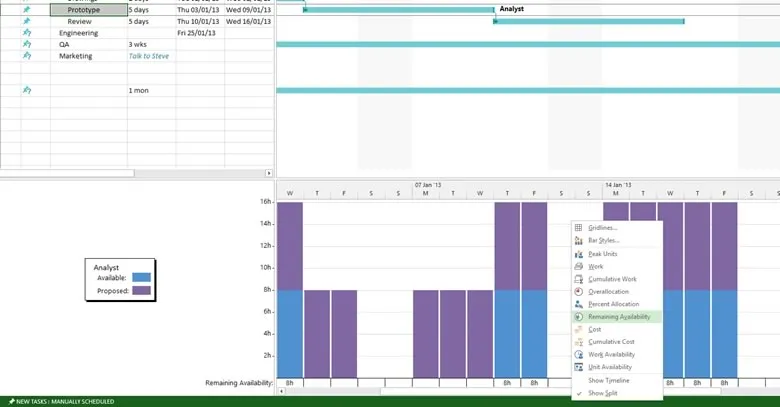
Note: In the Assign Resources dialog box, there is a Graph button. This feature has changed from the previous versions of project. When you click the Graph button you will see a split screen view with the Gantt chart in the top half of the screen and the Resource Graph view in the bottom half. You can right click the graph to display further details:

Assigning additional resources to reduce task duration
If you later assign additional resources to a task, by default the work on the task is initially shared equally between the Resources and the Duration is reduced. However, you can modify the work allocated to each resource using the Task Entry View:
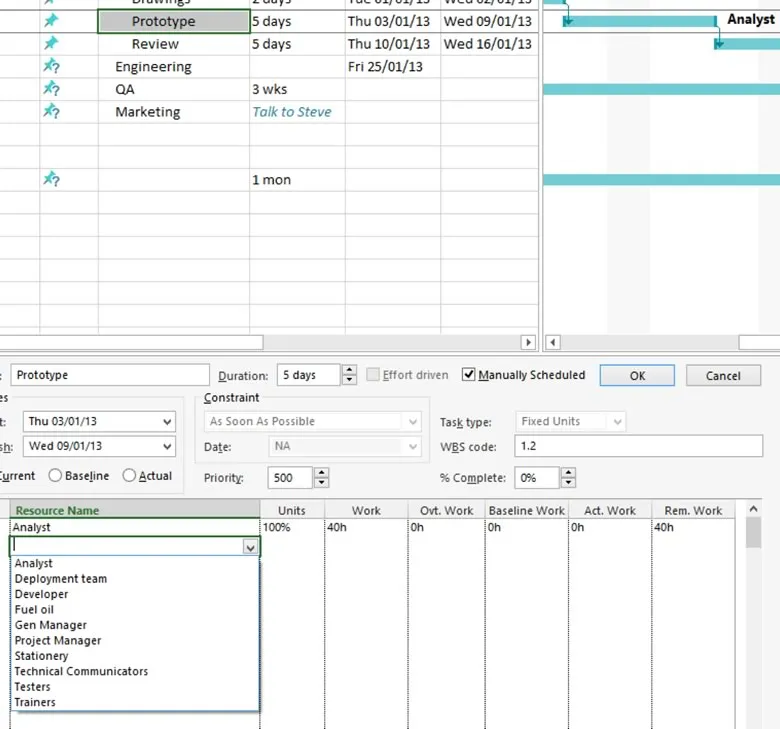
- In the Gantt Chart, click the Details command on the Task tab to split the screen and place the Task Form in the bottom half.
- Right click the form and choose Work:

- Assign another resource using the drop-down list of resources as shown above.
- In the form, you can edit the Work against each Resource assigned to the Task to give your required split of Work - the Task Duration is automatically recalculated (you are not bound to stay with the original total hrs work).
- Click the Form’s OK button (pressing Enter is not the same here as OK).
- In the form, you can also change the Units of each resource on the task and this will also recalculate the duration of the task.
- Edit the Task Duration in either half of the screen and notice that the work for the work for the Driving Resource(s) is automatically recalculated
Also see How Project recalculates the task duration in Auto Schedule mode
