Working with Multiple Projects in Microsoft Project
This module explains how to handle multiple projects. You’ll learn how to create links between projects. Since working with a single file is always faster if you can help it, this module will also explain how to consolidate projects. You’ll learn how to view multiple project critical paths and consolidated project statistics. Finally, this module explains how to create a resource pool. Also view how to add costs to projects.
For an instructor-led Project training classes in Los Angeles call us on 888.815.0604.
Inserting a Subproject
Use the following procedure to link a project in a master project
- In the blank project, from the Gantt Chart view, highlight the row where you want to insert the project.
- Select the Project tab.
- Select Subproject.

- Highlight the project you want to insert.
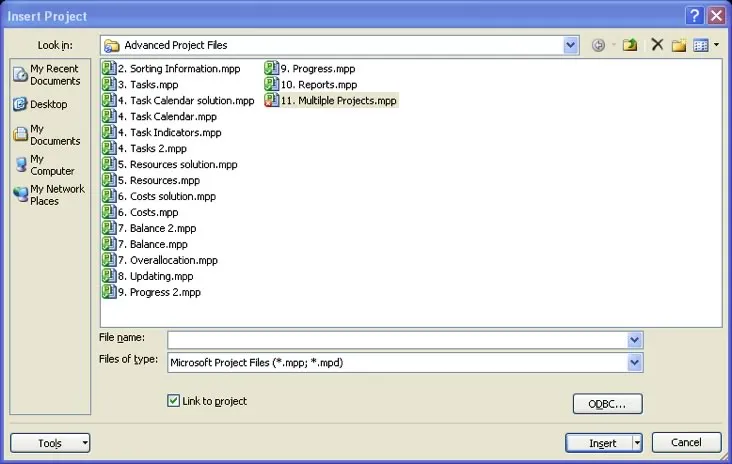
Note: To insert multiple projects, hold down CTRL and click the projects in the order that you want to insert them.
- Make sure the Link to project box is checked. However, if you do not want to update the subprojects with any changes made to the master project, clear the box.
- Select Insert.

View shortcuts for Microsoft Project 2013
Consolidating Projects
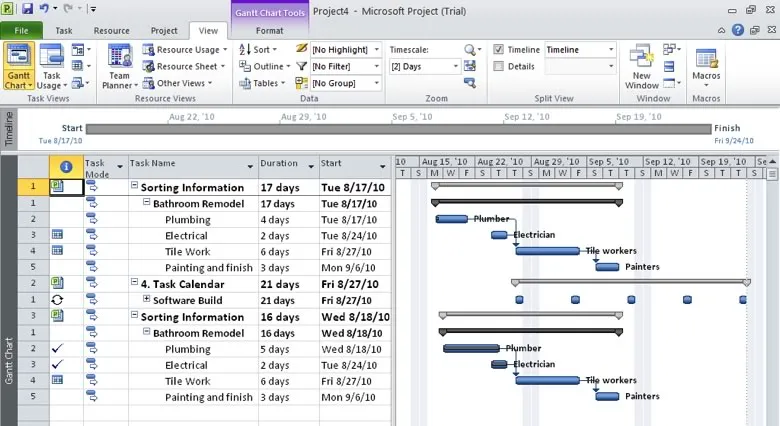
To consolidate projects for printing, use the following procedure.
- Open the project files you want to combine.
- Select New Window from the View tab on the Ribbon.

-
Highlight the first file you want to appear in the consolidated window. Hold the CTRL key to select subsequent projects in the order you want them to appear.

- Select a View option from the drop down list.
- Select OK.
Viewing Multiple Project Critical Paths
Use the following procedure to display multiple critical paths.
- Select the File tab from the Ribbon.
- Select Options.
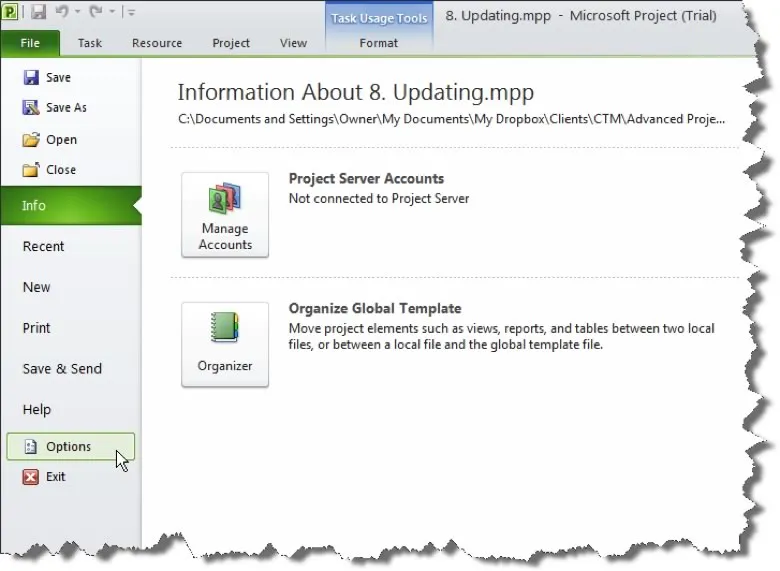
Project opens the Project Options dialog box.
- Select the Advanced tab.
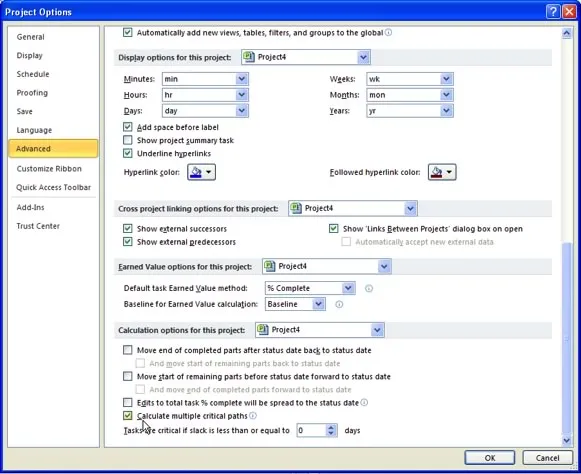
- Check the Calculate Multiple Critical paths box.
- Select OK.
- Select More Views from the View menu.
- Select Detail Gantt.
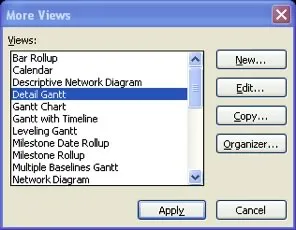
- Select Apply.
Viewing Consolidated Project Statistics
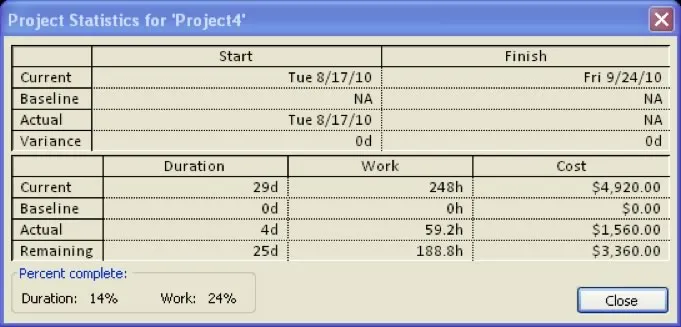
Use the following procedure to review the project statistics.
- Select Project Information from the Project tab.

Project opens the Project Information dialog box.
- Select the Statistics button.
Project displays the Project Statistics dialog box.
Creating a Resource Pool
Creating a resource pool.
- The project that includes the resources becomes the resource pool. Open that file, plus the file that will share resources, which is the sharer project.
- Select the sharer project from the Window area of the View tab.

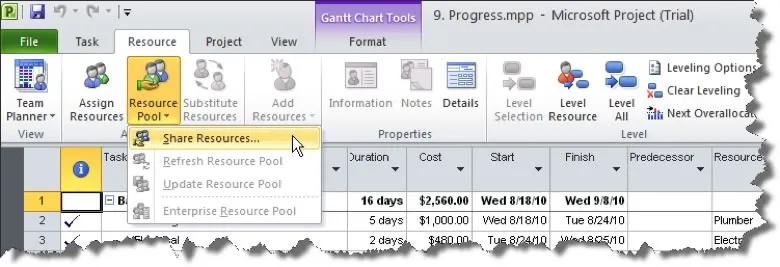
- Select the Resource tab.
- Select Resource Pool.
- Select Share Resources.
Project displays the Share Resources dialog box.
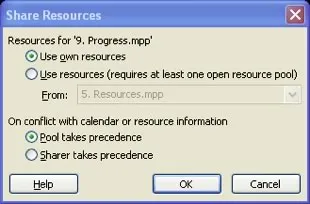
- Indicate whether to use the project’s own resources or the resources from another project. If you select Use Resources From, select the project from the drop down list.
- Select how to handle resource conflicts. This indicates whether to overwrite any duplicate resource information, such as rates.
- Select OK.
View the Resource Sheet to see that the resources are now available to use in the active project. If your project already had resources entered, the resources from both of the projects are combined.
Visit our Project resources page for more tutorials.

